We’ve prepared a video and a step-by-step explanation on how the Sender Email action can be designated for sending automatic emails in the automation process.
Before making this connection, you need to have a professional email elsewhere.
For this tutorial, I have the email on Hostinger. However, you don’t necessarily need to be on it.
It’s mainly so you can access your domain’s Webmail.
That said, you’ll follow this tutorial.
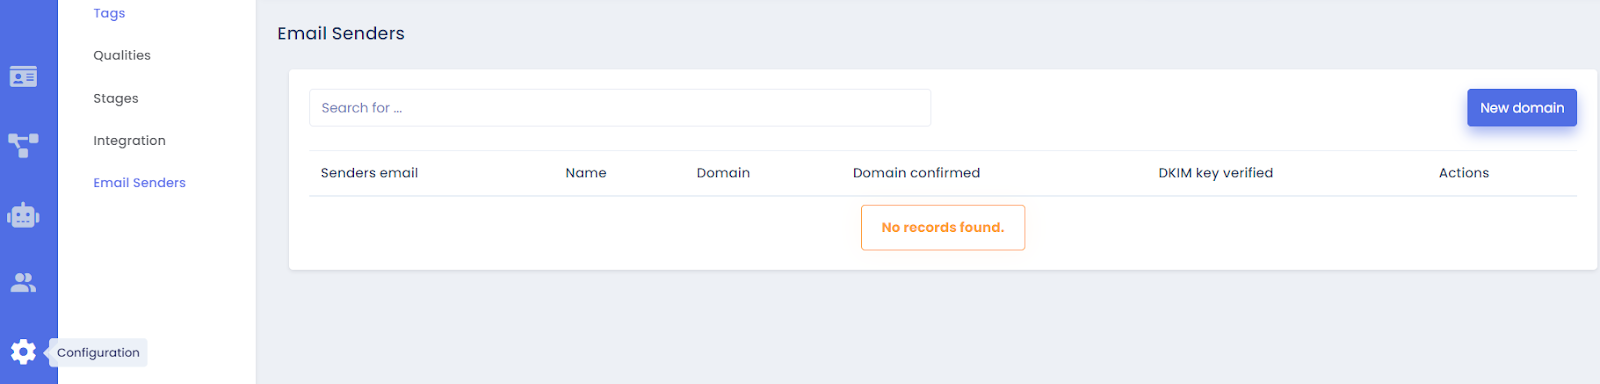
Click on Configuration, located in the blue sidebar.After that, click on Email Sender, and you’ll land on this image below.
When you click on ‘New Domain,’ this screen will appear below.
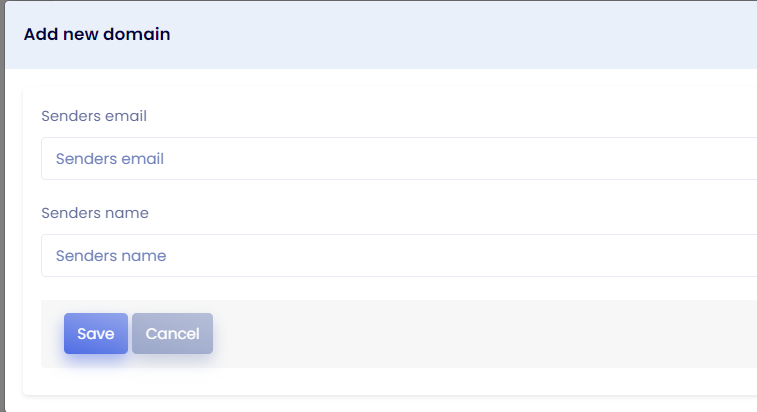
Here you will enter your professional email and the name you want to appear for the lead.
When you click on Save, these data will appear.

Now you’re going to click on the tool under Actions to reveal these DNS settings below.

In this next step, you will log in to Cloudflare.
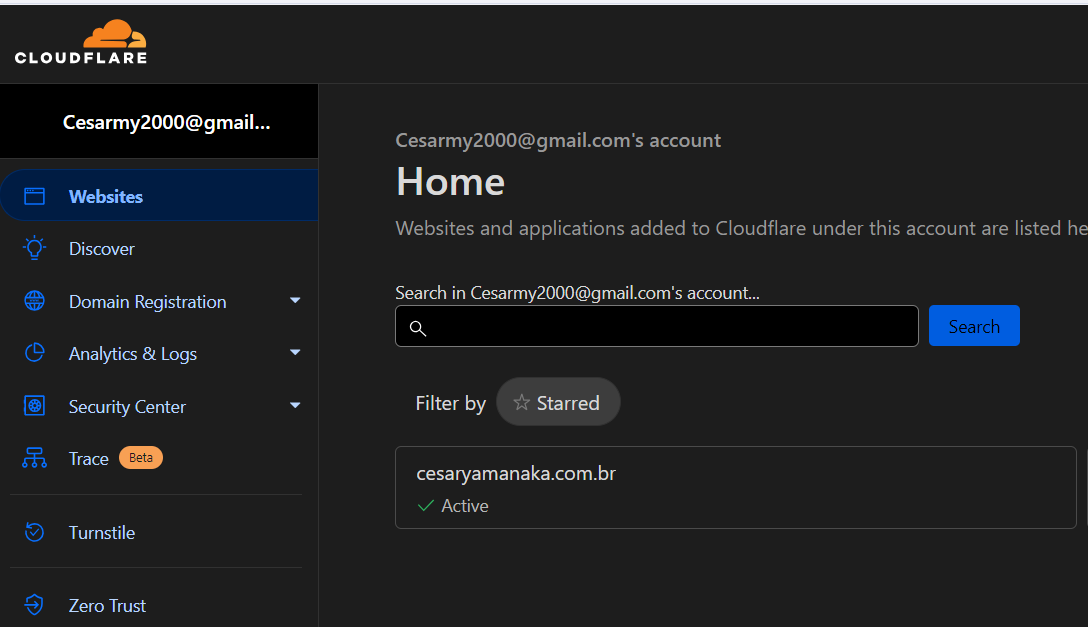
Just click on your domain and then on DNS.

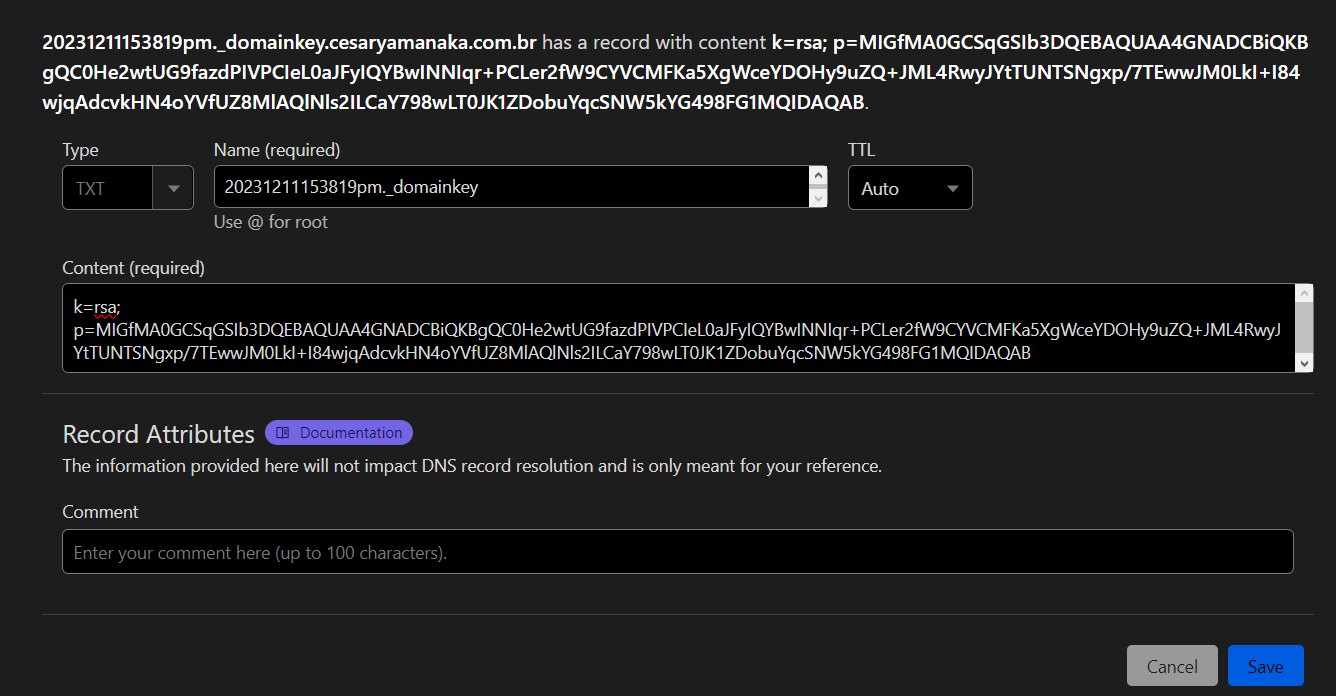
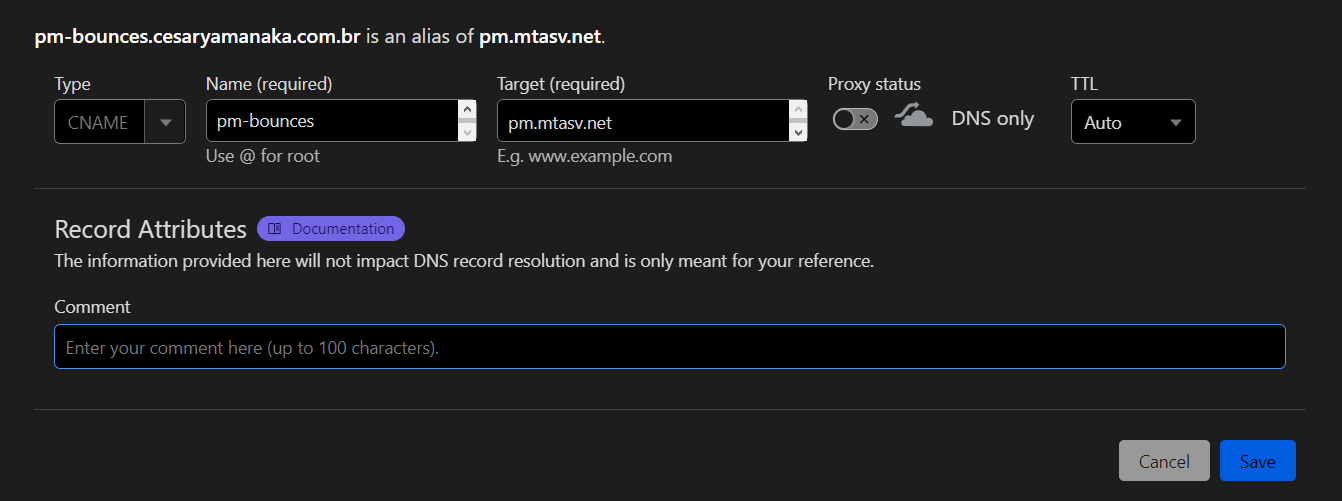
Now, you’re going to click on the blue button to Add Record.
You will input your data as shown in the example below.
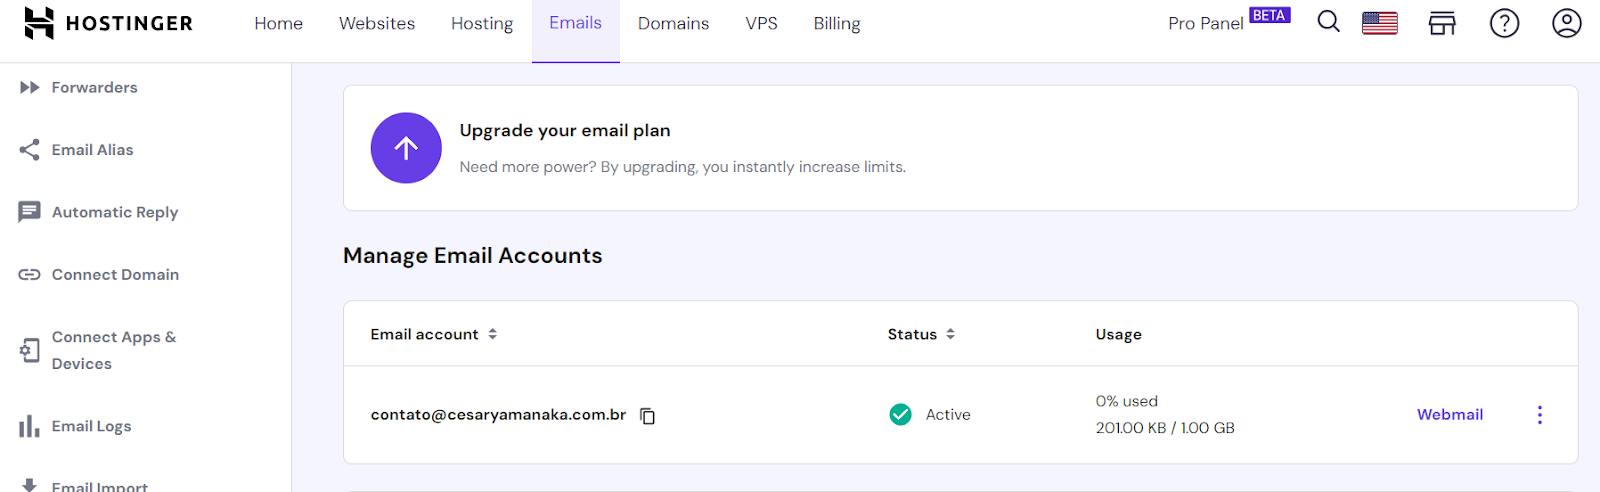
After adding the two pieces of information, you need to open the webmail to access the email that was sent to you to confirm this configuration.
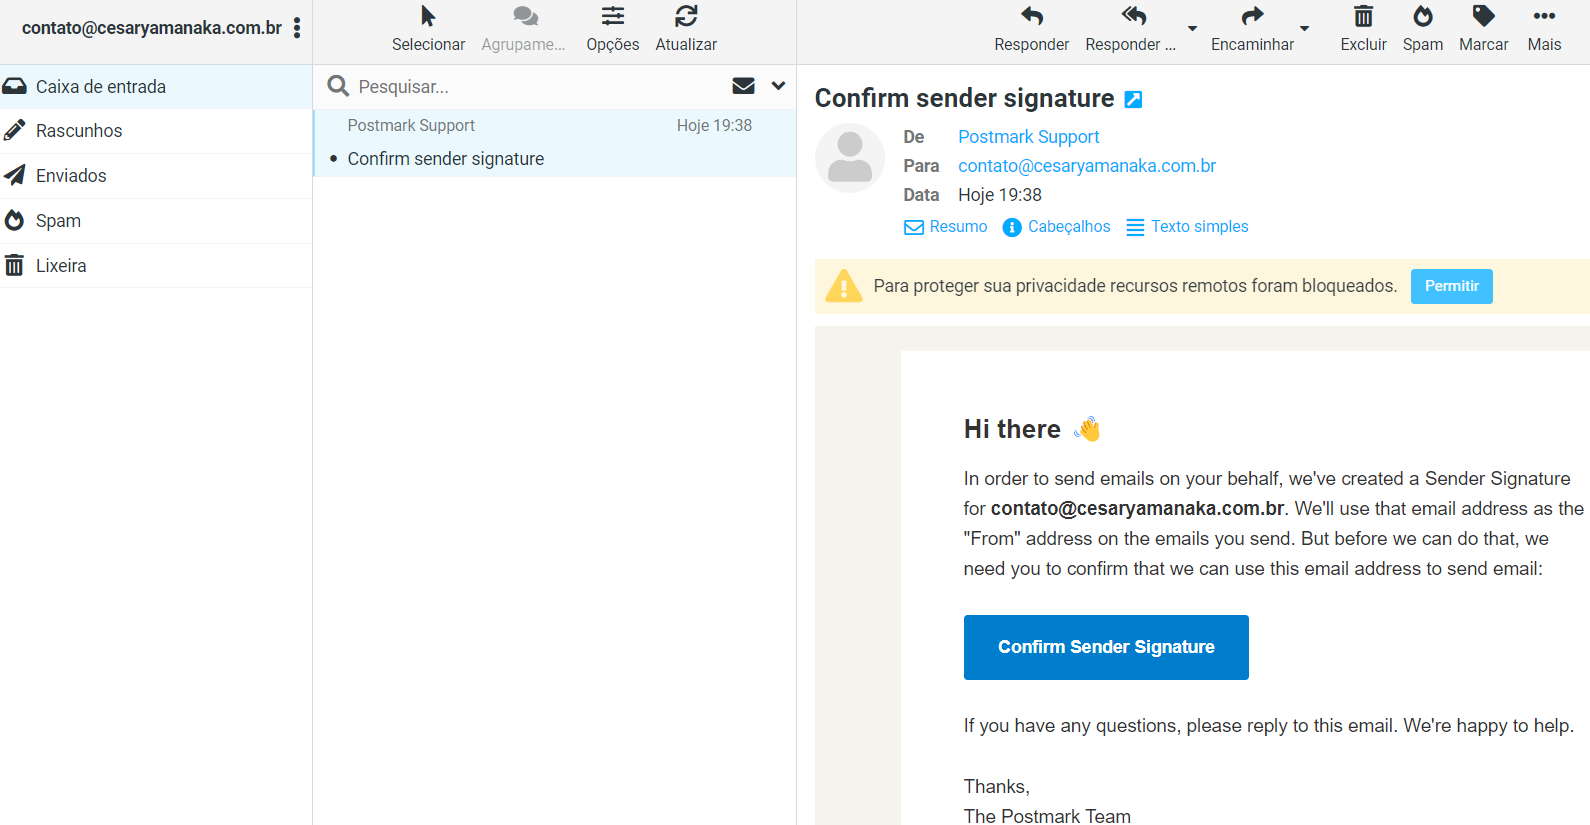
When accessing your Webmail, open this email and click on the blue button to confirm your subscription.
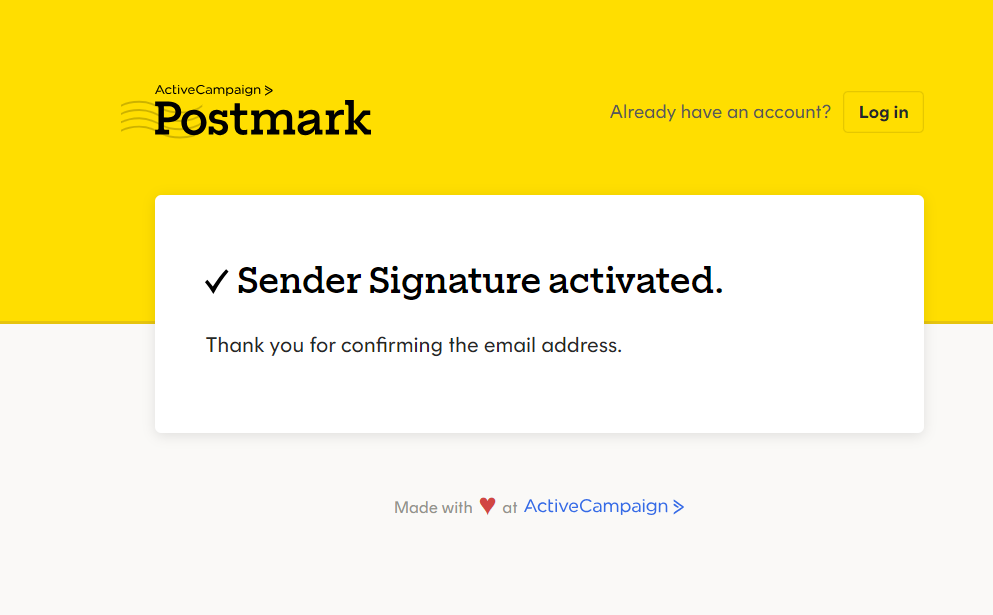
When you click on the blue button, this image will appear below, confirming the activation for you.
Now, you’ll need to wait for up to 24 hours for the system to establish the connection.